
1. Animation
DragonBones [DB] has 2 modes.
- armature
- animation
The idea is to setup your character first in armature mode so that you are able to make animations in the animation mode. So click or switich to animation mode now.
1.1 Animation Mode
You will see a few more panels that are added to screen. The most important and noticeable one is the Timeline panel. To get some breathable area and make everything less confusing close the property and curve editor panel. We don't need them for this tutorial.
Furthermore turn of rulers. They are also not needed for now. To close rulers
go to File > Preference.. and select Rulers from the list. Then deselect show rulers. Click finish.
So we have a bit more free space and it doens't feel all that tight.
Remember: You can always reset the panels from the Window on the navbar on top. You can activate rulers from the preferences again.
1.2 Hide Elements
If you followed my tutorial all through and used the exact same character then you should have the Hello World text. I put it for some purpose there but for now it also is not needed.
Either find the text object under the scene panel or click on it on the scene. If you choose the latter one it will be highlighted on the scene panel. Next hover with your cursor on the object. You will notice that just next to the element you are hovering a round checkbox appears. If it has a dot inside it means it's shown in the scene. Simply uncheck it to hide the text.
So now we really can animate the stickman.
Click on the checkbox again to show the hidden element
1.3 Say Hello
1.3.1 Rotating Lower Arm
Our first animation should be something really simple. Let's just animate first I'll give a short explanation afterwards ;D
Follow these steps
- Select lower arm bone
- Hit [ K ] on Keyboard
- In the timeline panel put the time marker (green line) on number 10.
Select the lower right arm of stickman
- go outside the bone/image area
- click LMB
- drag your cursor up
- release mouse
- hit play (on the timeline panel)
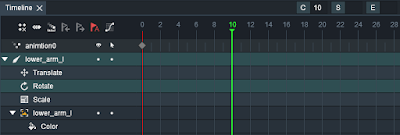 |
| Put timemarker on frame 10 [Step 3] |
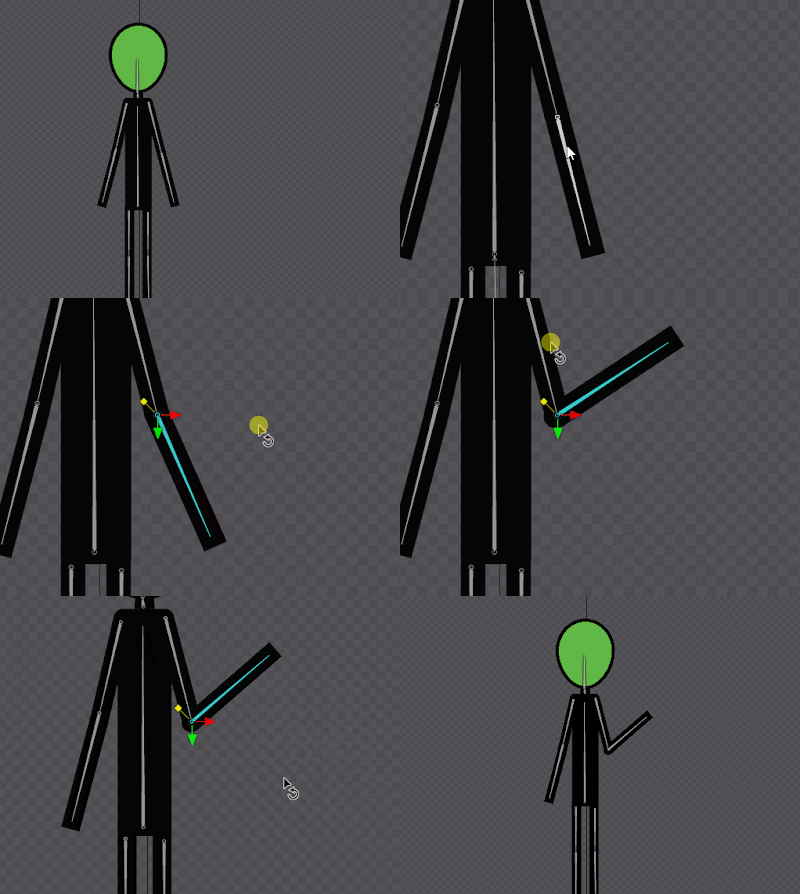 |
| Rotate lower arm [ Step 4-8] |
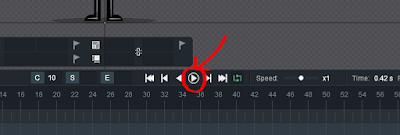 |
| hit play [Step 9] |
So then you should notice that without we do anything futher the arm automatically rotates to the position we have put it earlier.
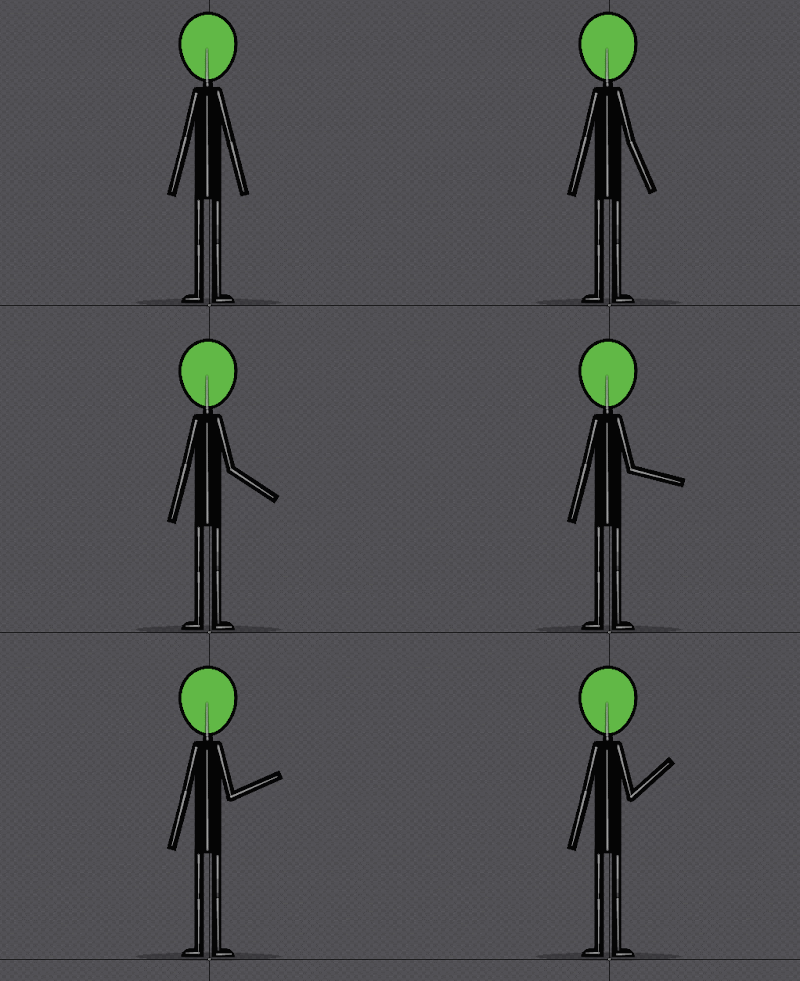 |
| Arm rotating |
1.3.2 Expand Animation Duration
Next add a bit of break before the animation restarts. Currently right after the lowerarm reaches the rotation we put it before, the animation immediately restarts which gives this weird look.
Follow
- Make sure you have no bone selected
- Go to frame 10 in timeline
- Find a blue square
- copy it with ctrl-c on windows
- set the timemarker on frame 30
- paste from clipboard with ctrl-v on windows
- hit play
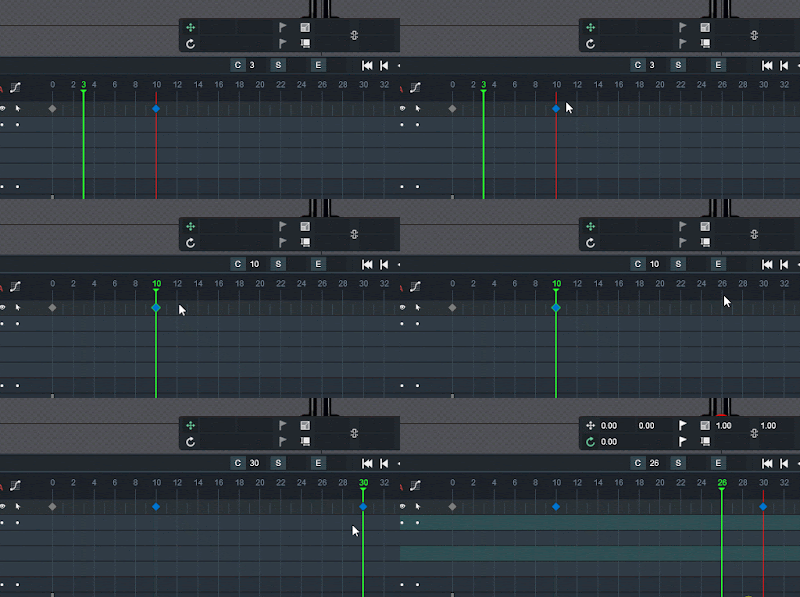 |
Putting a break between animation restart
|
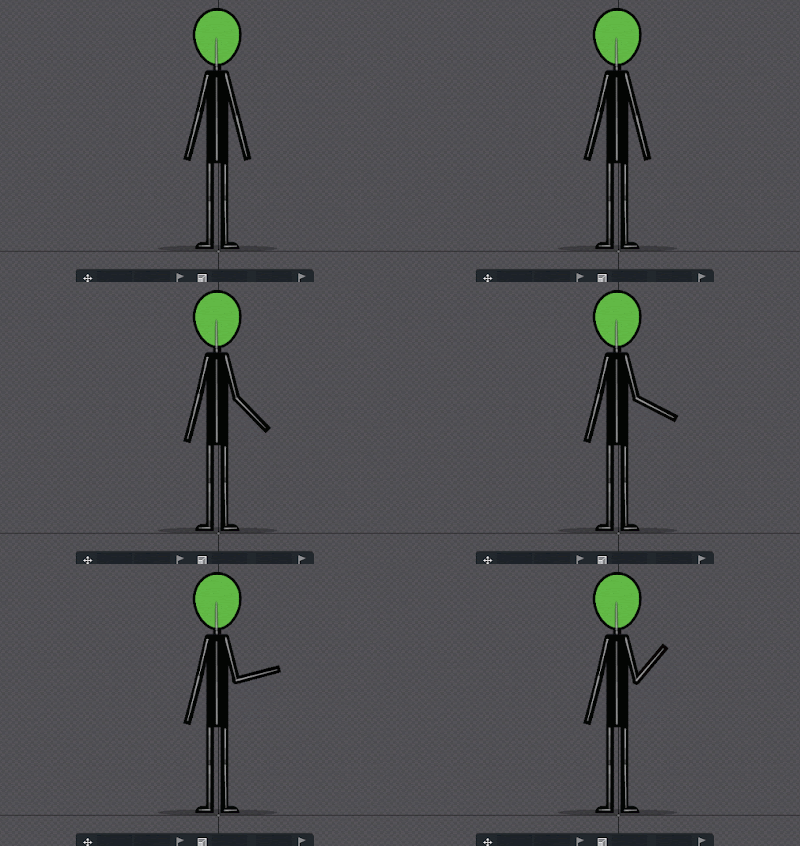 |
| Paused duration before animation restart |
1.3.3 Return to default pose
Now we can quickly extend this a little more. The arm abruptly moves back once the animation restarts. That too doesn't look so well. So let's make a loop out of this for a smooth animation.
Follow
- Make sure on the timeline you are at the top (scroll up if necessary)
- Make sure everything is deselected (press escape if not)
- Go to frame 0 in timeline
- Copy the white square
- Move to frame number 40
- Paste from clipboard
- Hit play
 |
Making a looped animation [Step 3-6]
|
1.3.4 Keyframes - The Key to animation
So basically the main point in being able to animate is through setting keyframes in the timeline. A keyframe is like a checkpoint for a bones properties that has been changed during the animation.
Keyframes hold all the data of a bone including position, rotation and scale on different frames.
For example on frame 0 we had the initial pose of the stickman with the lower arm being at 0 degree. Then we went over to frame 10 changing the rotation degree. And you should have noticed that a keyframe automatically was set in the timeline. That means there will be an interpolation between the initial pose of the stickmans lower arm and the current pose. This then results in a smooth arm rotation.
A bone specifies the What to animate . The timeline specifies the When to animate
2. Idle Animation
I want to add here that I'm not about to teach you the perfect animation right now but how to use DragonBones and how to animate with DragonBones. When we are done with the basics we can go and actually learn how to make real amazing stuff with DragonBones.
2.1 Add a new animation
1. Go to animation panel
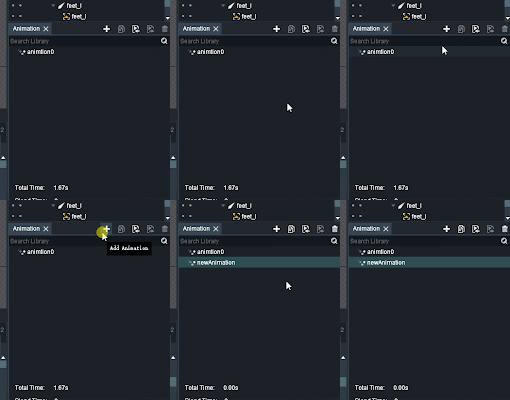
2. click on the plus sign
That will simply add a new empty animation with the default pose. The default pose is always how your character is setup in the armature mode.
2.2 Rename animation
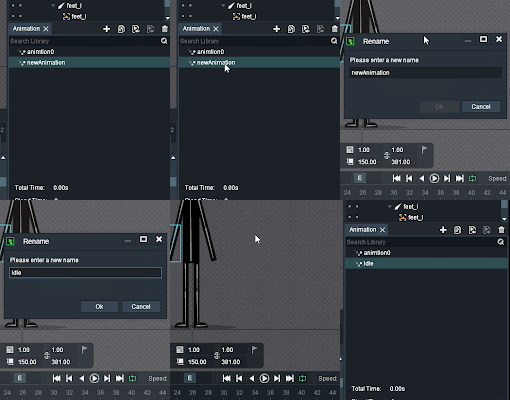
Double click the newly added animation. This will open a new window where you can give a name. Name it idle and hit ok.
Notice that the newly added animation name under the animation panel is changed to "Idle" now.
2.3 Keyframe them ALL
Ok. If you remember when you should move the stickman lower arm one of the first steps was to hit the letter K on the keyboard. The shortcut K could stand for "Set a Keyframe on current timemarker for the selected bone".
The best approach I found in animation is to simply keyframe everything for the first frame since it doesn't matter when the bone isn't changed. However it does matter when the bone property value is changed but you missed to keyframe the very first frame. Because then there will be no smooth interpolation for the bone properties. How could it be? An interpolation is only possible between 2 keyframes. So it's really important to key everything right from start to prevent any headache later
2.3.1 K for Keyframing
- Make sure you have deselected everything (press ESC if not)
- Make a selection box over the entire stickman character
- Go to frame 0 on the timeline
- Hit [ K ]
This really keys every possible property for all the selected items.
A white, blue, red, yellow and gray marker in the timeline means that a keyframe is set
2.3.2 Move the head
- Set timemarker to 12 (Do i neeed to show this? No right? )
- Select head bone
- Slightly move it down. Noticeable but not exaggerated.
2.3.3 Move the hip
- Select hip bone
- Slightly move it down just like the head

2.3.4 Correct the legs
Moving the hip moves the entire body since we rigged the stickman in that way. We could have rigged him differently so that the legs are independent from the body but it always depends on what is needed. Anyways.

1. Select the left and right upper leg
2. Try to position it up again that it matches it's original position
2.3.5 Sway the arms
1. Select left arm
2. Slightly rotate it in opposite direction of the stickman
3. Repeat for right arm

2.3.6 Loop it !
Now this is quickly done. We did that when we animated the arm rotation. We just need to do the same to loop. Go to frame 0 copy all keyframes then paste it to the 24th frame
Remember to copy the keyframe for all bones not just one keyframe of one bone. Use ctrl-c to copy and ctrl-v to paste. Move your timemarker before you paste!
2.4 Done

Idle animation is one of the first animations I start with when I have a new character. The reason is that idle is a real quick and easy way to test whether the character setup is done correctly and being able to see the character in motion is somehow ... satisfying .
However this does not mean an idle animation is always easily done. Sometimes when I get idle animation requests from customers it's not this basic idle animation of the stickman that is demanded mostly..
But as I mentioned earlier we are not about to learn yet the differences between a noob and a pro animation ;D
3. That's it for this tutorial
We learned..
- how we can enter animation mode / how we swtich from armature to animation
- how we can show / hide rulers
- shortcut for keyframing bones
- the importance of keyframes and the timeline for animation
- how to transform bone properties, keyframing and thus animating a character
- adding a new animation
- renaming animation
- how to preview an animation
- the meaning of the different colors in the timeline
In the next Tutorial we will learn that not only bones can be animated but images as well and the restrictions in animating images. We will make a walk animation and go even deeper in understanding the timeline and keyframes.
Next Part: Character Animation IV
Teddy
If you followed me through here and you are really interested into DragonBones I actually have a full platformer like Teddy Bear game asset for purchase [ only 7$ ]. The package comes with 40+ animations such as walk, run, jump, attack, hurt, die but also many advanced stuff like dancing, swimming, driving a vehicle, sliding, push & pull animations etc. that are all done with DragonBones.
You can learn a lot just by exploring the source DragonBones file for Teddy and maybe have fun putting it into your video game as well ;D